Project Highlights
- Storage platform deployment using TrueNAS and ZFS integrity protections
- RAID-Z2 fault-tolerant architecture design
- Local user account creation for authenticated file access
- Dataset creation and permission management
- SMB share configuration for Windows access
- Network drive mapping from a client system
Greetings!
This article documents the initial setup and configuration of my home NAS (network-attached storage) system.
Project Background
During a period of time off from work while pursuing my bachelor’s degree in cybersecurity and applying for entry-level roles, I set out to build a project that demonstrated hands-on infrastructure, storage reliability, and secure system design practices. My existing NAS was running on a repurposed full-tower desktop system, which was functional but not optimized for long-term availability or data integrity.
To improve system reliability, I rebuilt the platform using more compact hardware and upgraded from standard memory to ECC (Error-Correcting Code) RAM, which helps detect and correct memory-level corruption before it can affect stored data. Because ECC support requires compatible motherboard and processor hardware, this resulted in a full platform refresh while preserving the original storage drives.
With a more resilient hardware foundation in place, the environment was ready for deployment as a dedicated NAS platform and the starting point for additional security and remote-access enhancements described later in this project.
The System
After researching several NAS operating systems, I selected TrueNAS Core as the initial platform. It is a free, open-source solution widely used for storage infrastructure and built on the ZFS (Zettabyte File System), which provides strong data integrity protections. At the time this system was deployed, TrueNAS Core was the primary recommended platform. Since then, it has entered maintenance mode and most active development has shifted to TrueNAS SCALE, which is now the standard community-supported version.
The latest community version of TrueNAS SCALE is available from the official TrueNAS download page.
Installing TrueNAS Core followed a standard operating system installation process using a bootable USB drive and guided setup prompts. Because this process is well documented elsewhere, this article focuses instead on post-install configuration steps.
During installation, I created a root administrator password. After the system booted, TrueNAS automatically obtained an IP address via DHCP (Dynamic Host Configuration Protocol). To access the web interface, I entered this IP address into a browser on my primary desktop system and logged into the TrueNAS management console. The dashboard initially displayed minimal activity since no storage pools had yet been configured.
Creating the Storage Pool
The first major configuration step was creating a storage pool from the available hard drives.
From the sidebar:
Storage → Pools → Add → Create Pool
At this stage, I:
- named the pool
- selected available disks
- chose the RAID configuration
Available RAID options included:
- Stripe
- Mirror
- RAID-Z
- RAID-Z2
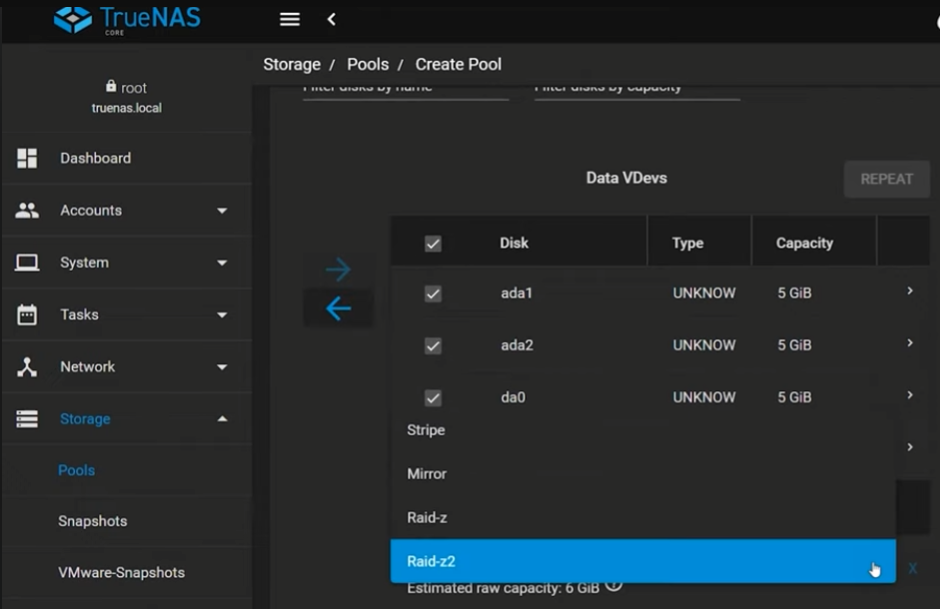
RAID-Z2 selected during pool creation to provide dual-disk fault tolerance.
For this deployment, I selected RAID-Z2, which is functionally similar to RAID 6. This configuration requires a minimum of four drives and allows any two disks to fail without data loss. Because TrueNAS uses the ZFS (Zettabyte File System), additional protections such as block-level checksumming help detect and prevent silent data corruption.
Storage Pool information can be viewed from the dashboard once configured. The dashboard displays the health statuses of the pool.
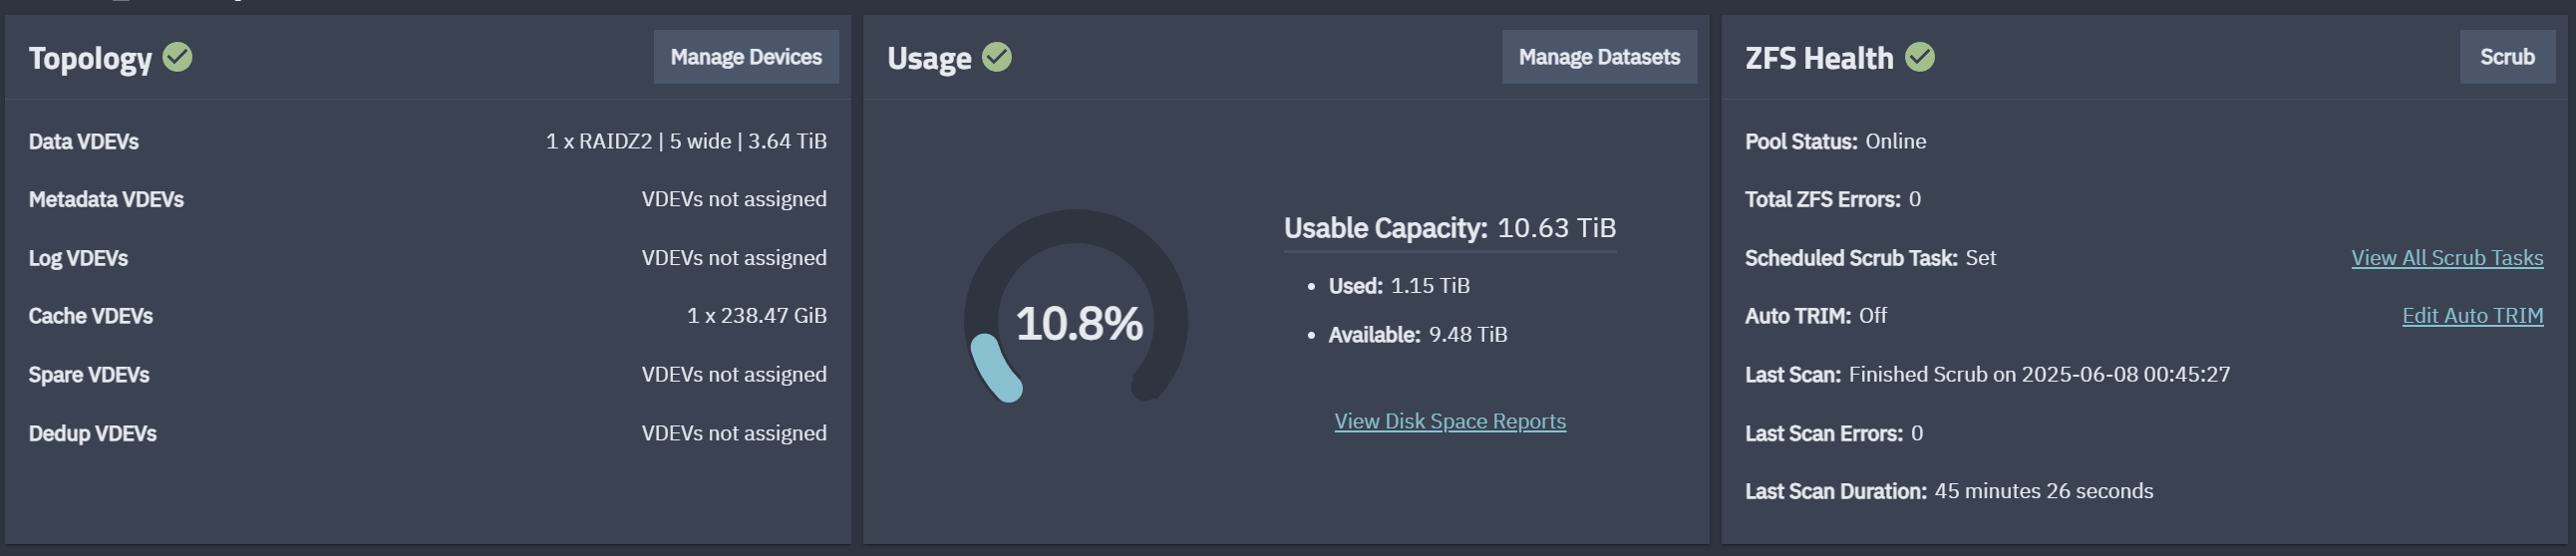
TrueNAS dashboard displaying the configured storage pool and system status.
Creating a User Account
After creating the storage pool, the next step was configuring a user account for file access.
From the sidebar:
Accounts → Users → Add
I created a standard user account with login credentials for accessing shared storage across the network. The Microsoft Account option was enabled so the dataset could be accessed later through Windows SMB shares.
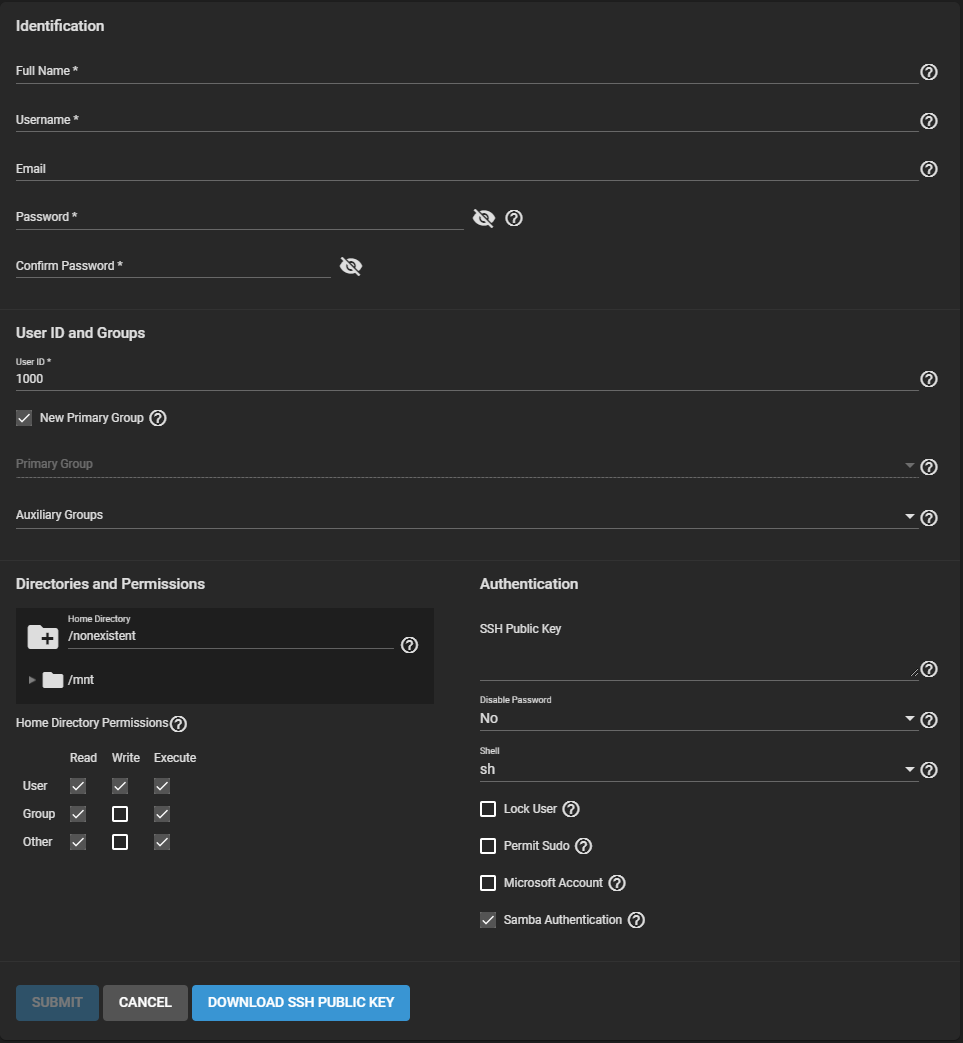
Creating a TrueNAS user account for authenticated SMB share access.
Creating Datasets
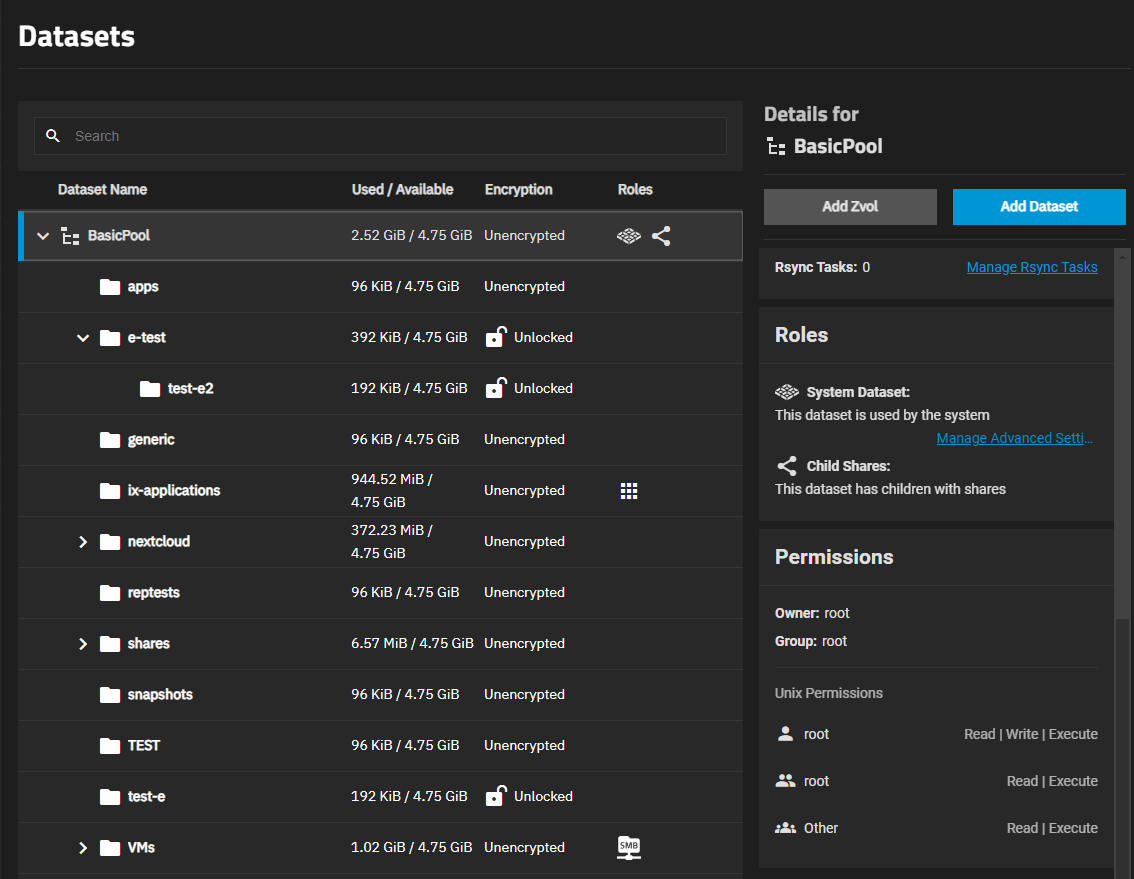
Next, I created datasets within the storage pool using default configuration settings. Datasets allow logical separation of storage areas and provide flexibility for permissions, quotas, and sharing policies.
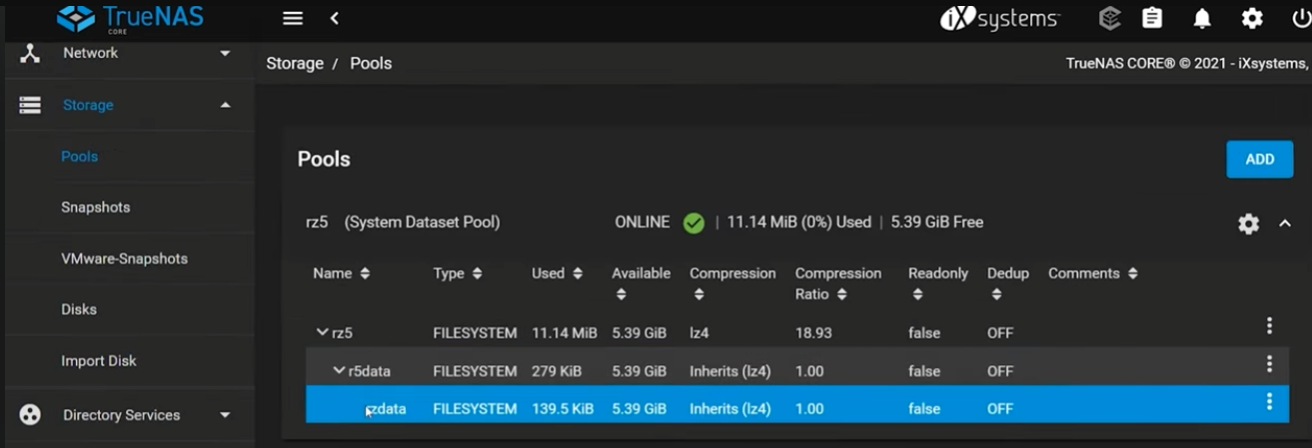
Dataset structure within the storage pool prior to permission assignment.
Within the nested dataset structure, I modified permissions by assigning ownership to my user account and enabling:
- Apply User
- Apply Group

Dataset permissions assigned to a dedicated user account for controlled network access.
This ensured proper access control for network file sharing.
Dataset structures are important and help the administrator organize data by grouping apps or users together. Below is an example of how datasets can be structured to separate storage by user, app, or function.
Example dataset hierarchy used to organize storage by service or access need.
Configuring SMB Sharing
To allow Windows systems to access the dataset over the network, I configured an SMB share.
From the sidebar:
Sharing → Windows Shares (SMB) → Add
I selected the dataset and enabled the SMB service.
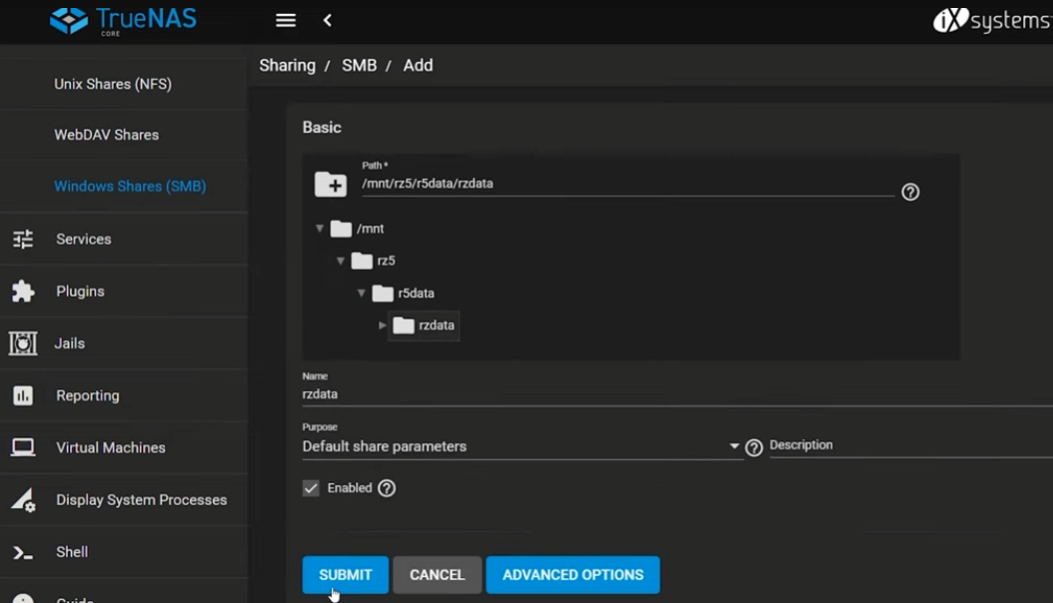
SMB share configuration used to expose the dataset to Windows clients.
During this process, TrueNAS prompted me to configure an ACL (Access Control List). I selected the default Restricted ACL template, which supports the Principle of Least Privilege (PoLP) by limiting access to authorized users only.
Additionally, you can verify active services by going to the sidebar and selecting "Services". There will be options available to toggle each service on or off as needed.
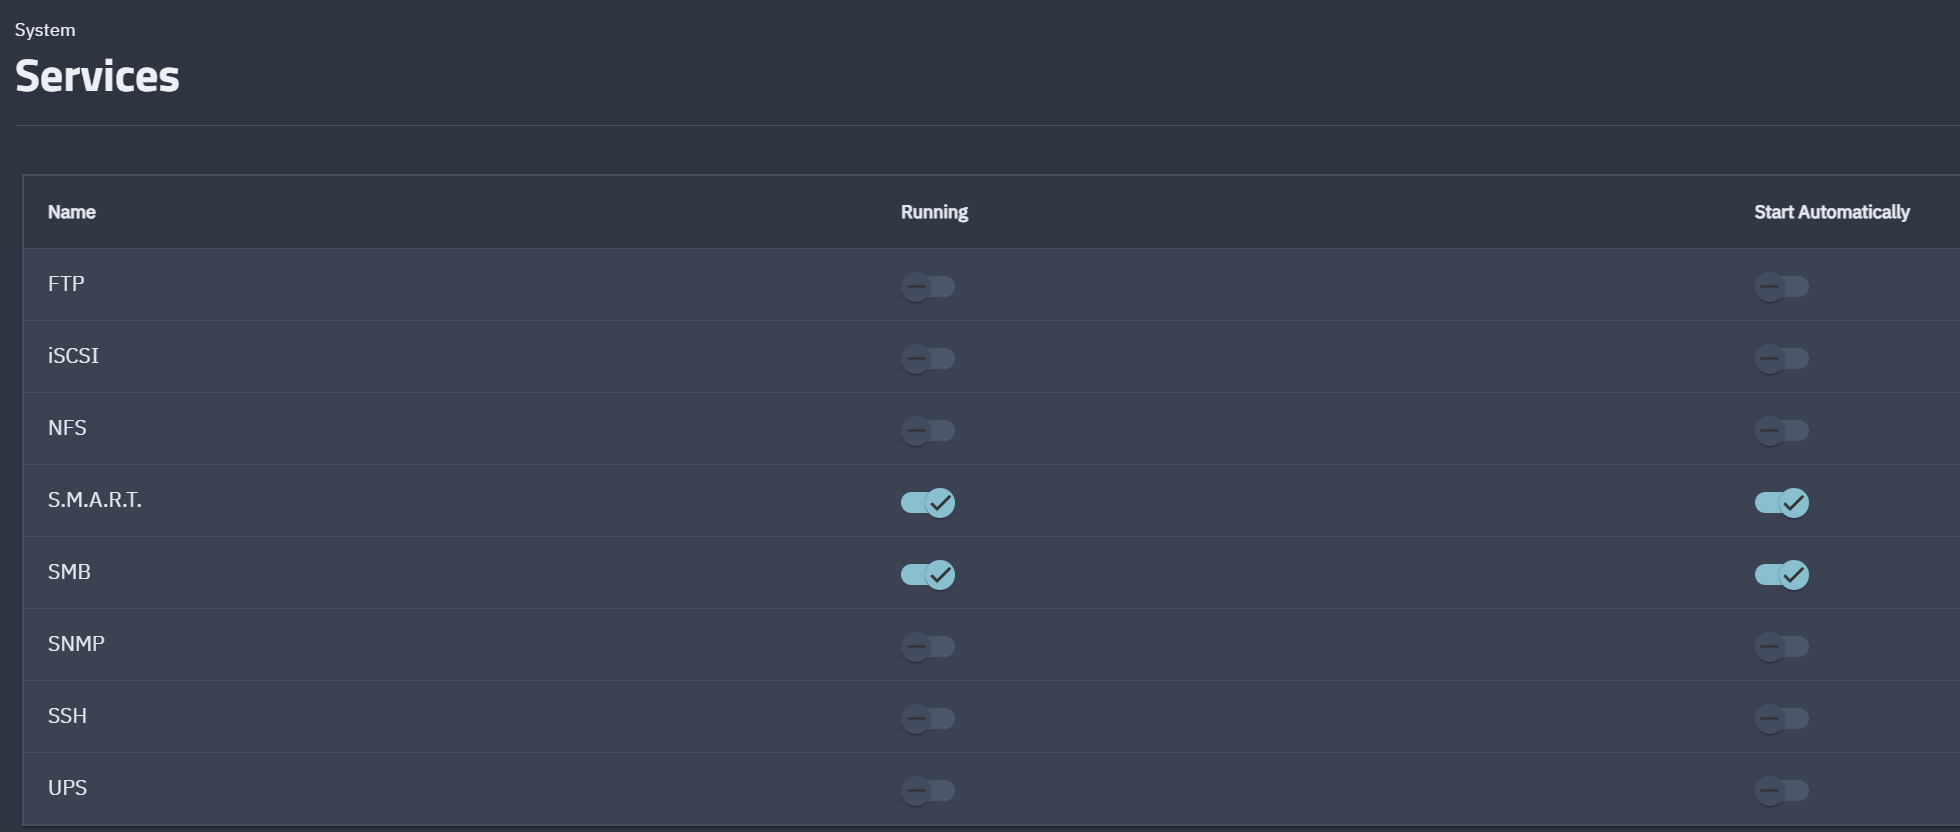
Services panel showing where SMB and other system services can be enabled or verified.
Mapping the Network Drive in Windows
Finally, I mapped the dataset as a network drive in Windows File Explorer.
Using:
\\ip-address\dataset-name
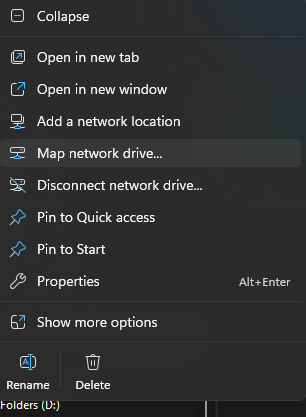
Windows Explorer context menu for choosing "Map network drive"
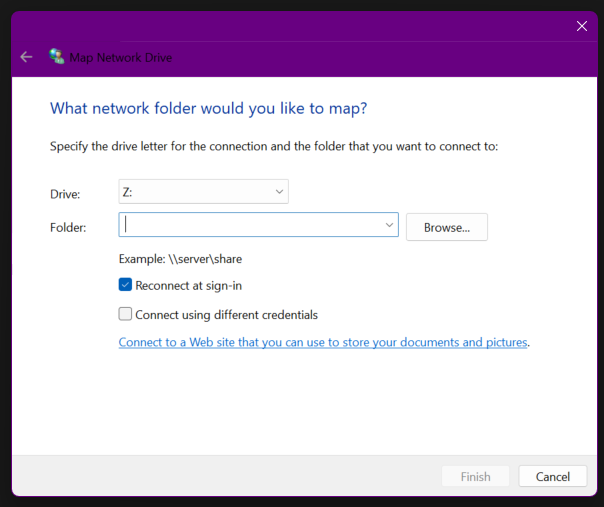
Windows Explorer path and drive selection for mapping a network drive.
I authenticated with the previously created credentials and successfully connected the NAS storage to my desktop environment.
At this stage, the NAS was fully operational and accessible across the local network.
Key Takeaways
This architecture demonstrates a structured approach to deploying a home network storage solution using TrueNAS SCALE with a RAID-Z2 ZFS configuration for resilience and data integrity. The system enables secure SMB-based file access within a controlled local network environment while separating user and application storage through dedicated datasets. By combining redundancy at the storage layer with clear network boundaries and service-level organization, the design reflects foundational infrastructure practices used in enterprise storage environments, adapted effectively for a reliable and scalable homelab deployment. 🖥️📁🔒
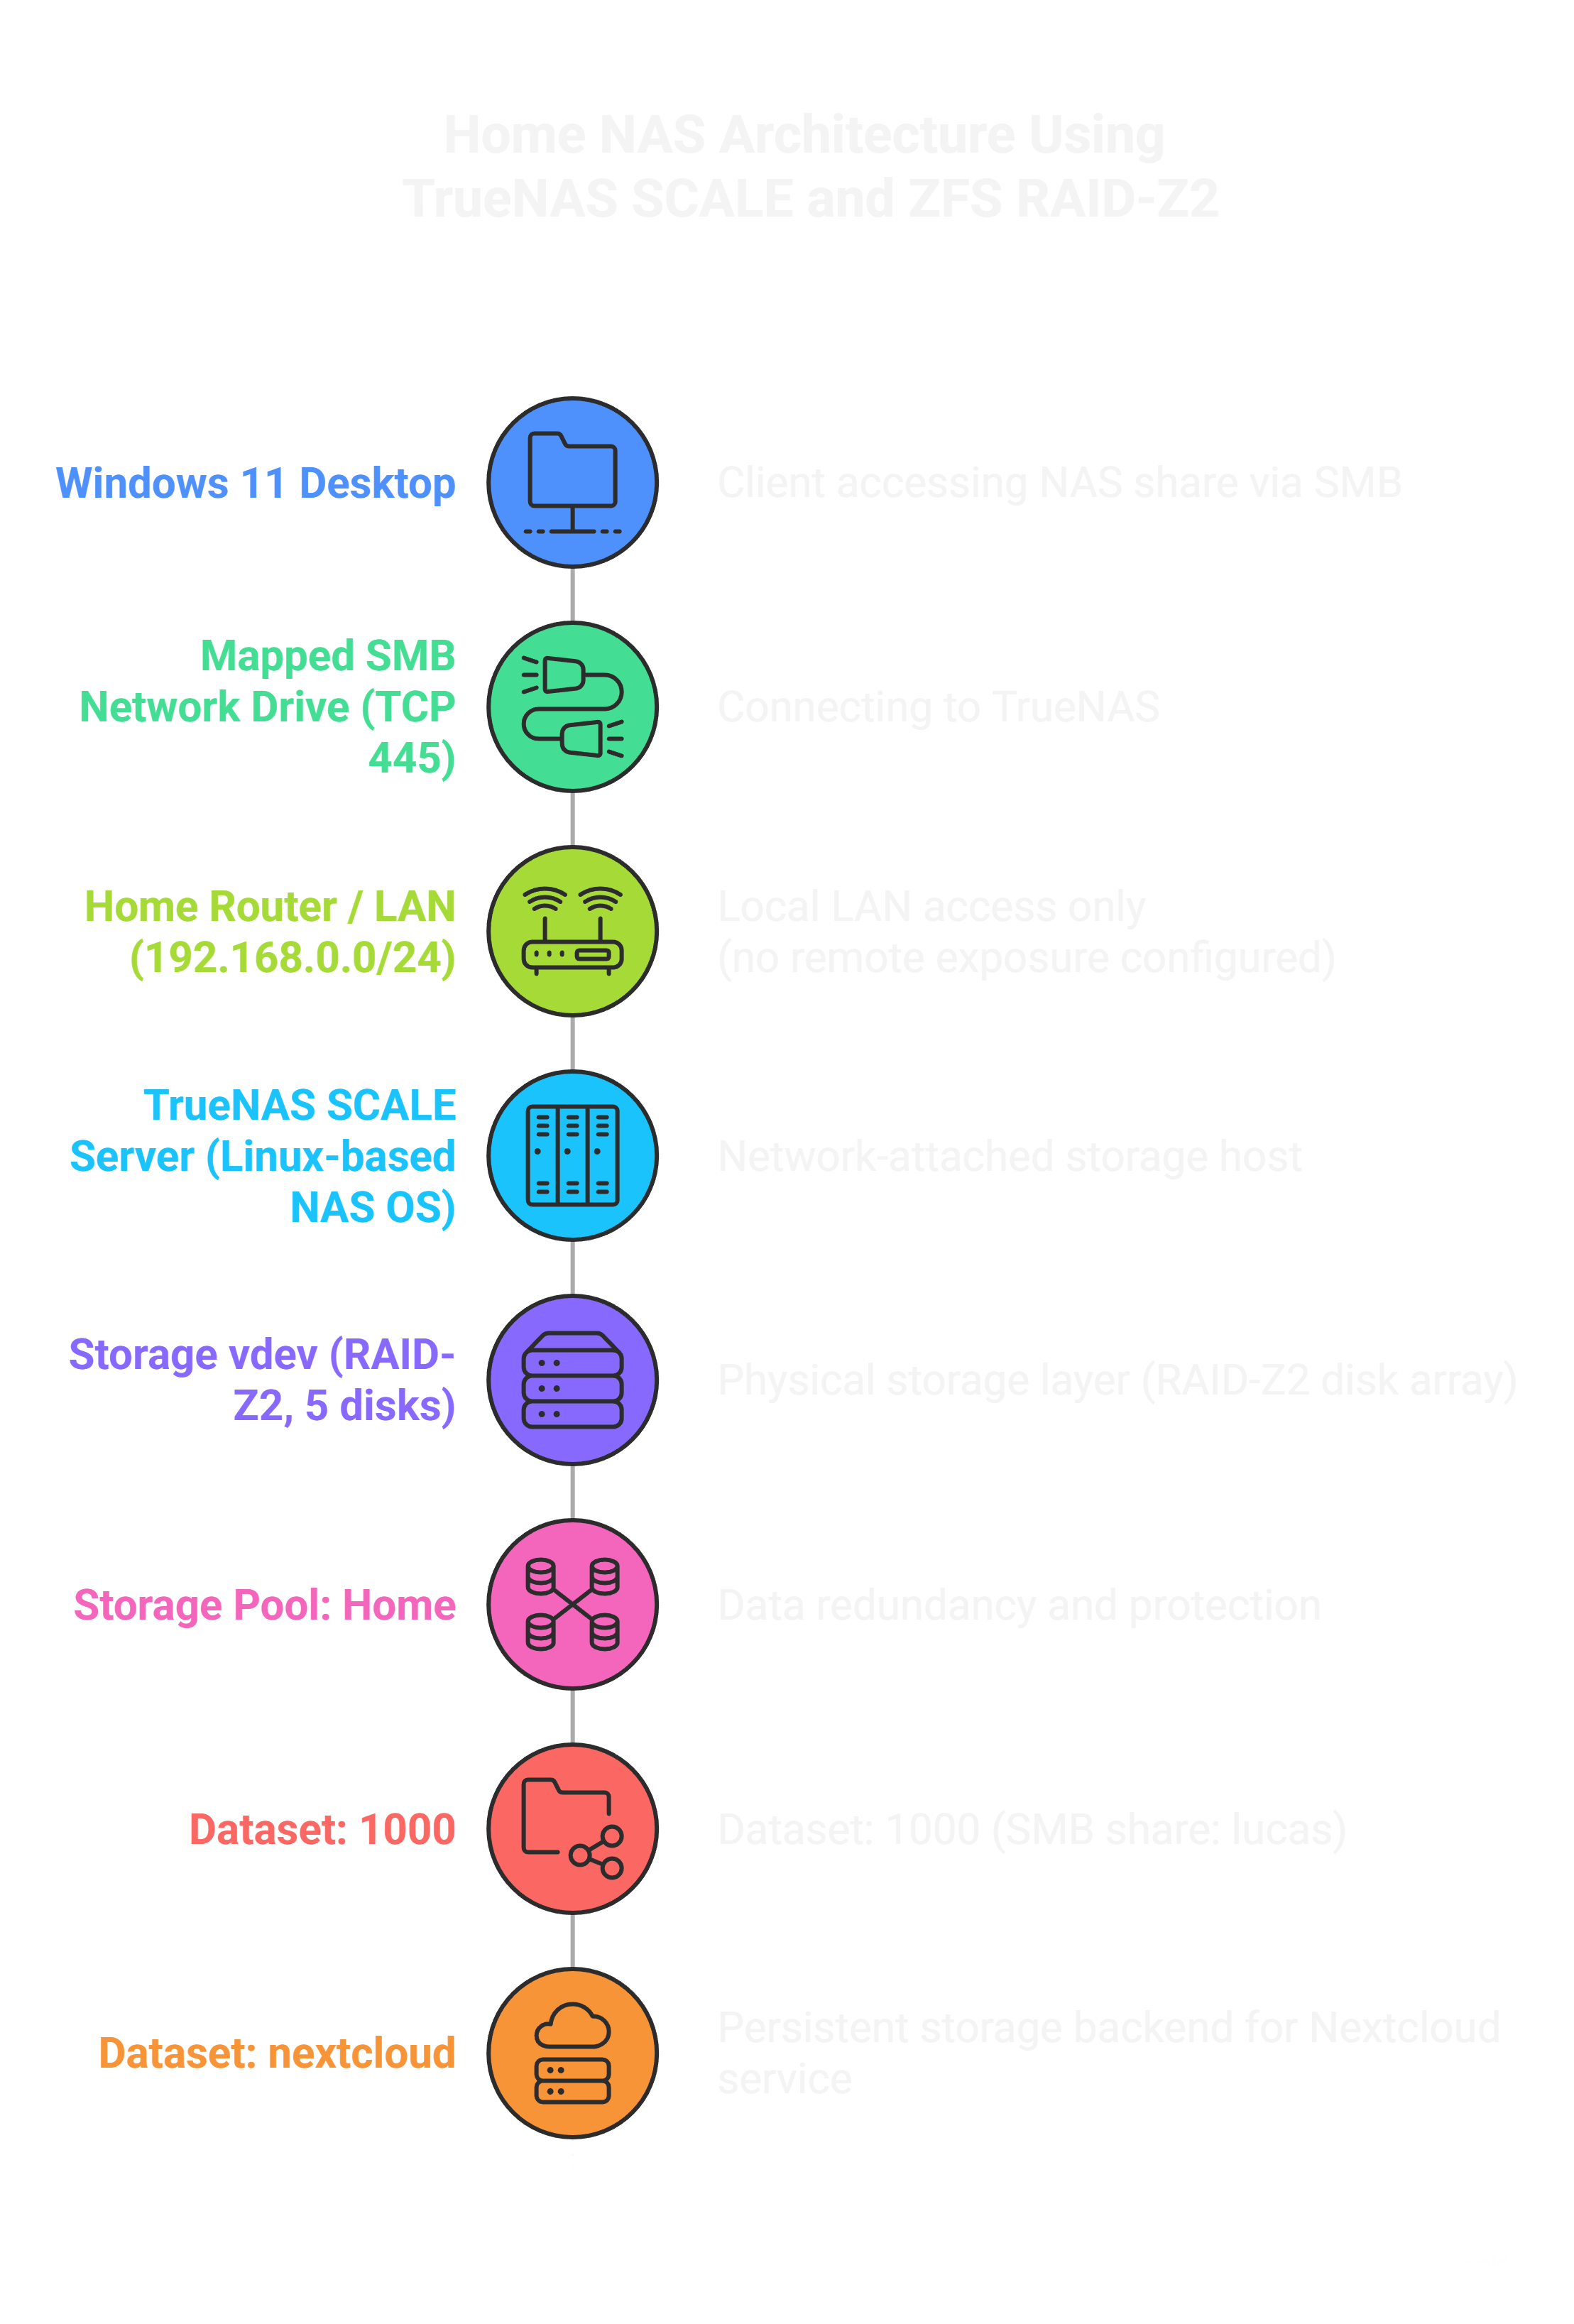
Architecture overview of the TrueNAS SCALE storage stack and SMB client access workflow.