Project Highlights
- Platform migration from TrueNAS CORE to TrueNAS SCALE for containerized application support and long-term platform compatibility
- Secure configuration backup including system config, secret seed, and dataset encryption keys prior to migration
- In-place GUI upgrade preserving storage pools, datasets, permissions, and SMB share accessibility
- Static IP reservation implemented to stabilize administrative access paths
- Deployment of Cloudflare Tunnel connector using Dockge container stack
- Persistent dataset mount configuration for tunnel credential storage
- Hostname-based ingress routing configured for controlled exposure of internal NAS services
- Remote access architecture implemented without traditional port forwarding or public IP exposure
- HTTP/2 transport configuration applied to improve tunnel connection stability
- Internal service validation performed prior to external hostname publishing
Greetings!
This article builds on Part 1 by documenting the migration from TrueNAS CORE to TrueNAS SCALE and the implementation of secure remote access using Cloudflare Tunnel. The goal of this phase was to modernize the NAS platform while introducing an outbound-only remote access architecture that allowed services to be published externally without exposing the home network through traditional port forwarding.
System Migration from TrueNAS CORE to TrueNAS SCALE
After evaluating platform changes and long-term support direction, I migrated my NAS from TrueNAS CORE to TrueNAS SCALE. SCALE introduces support for containerized applications, virtualization (KVM), and expanded automation capabilities, making it better suited for a modern homelab environment.
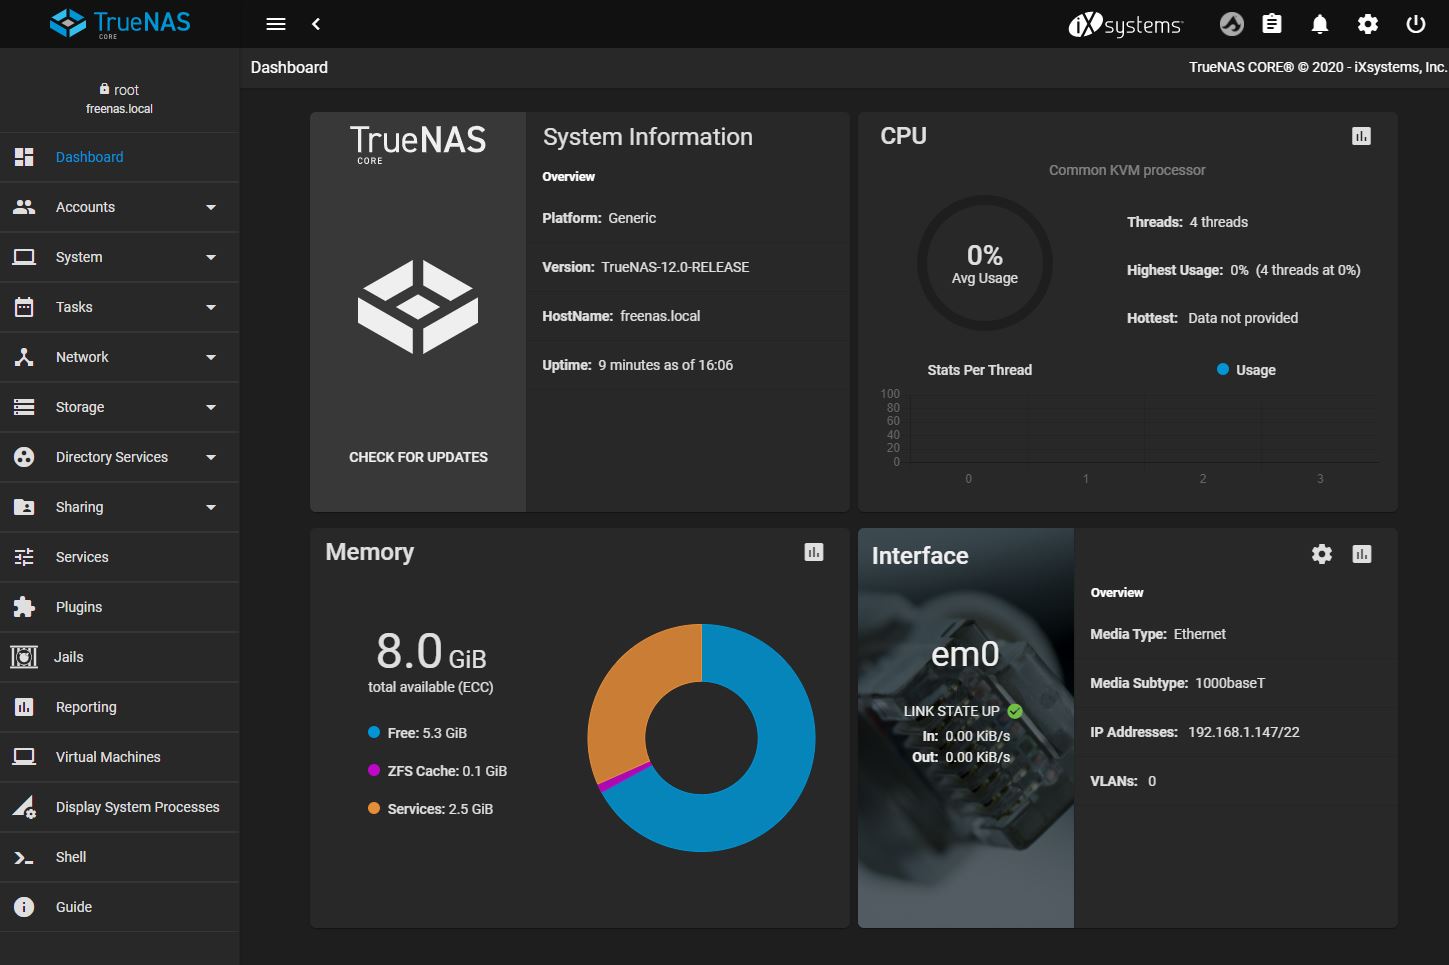
Reference view of the TrueNAS CORE dashboard prior to migration (ServeTheHome, 2020).
Because CORE had entered maintenance mode, migrating ensured continued feature availability and compatibility with newer deployment tools.
Before beginning the migration, I completed several preparation steps:
- Backed up the TrueNAS configuration file
(System → General → Save Config) - Exported the secret seed (required for encrypted credentials)
- Exported dataset encryption keys (if encryption is enabled)
- Reviewed the official migration documentation provided by TrueNAS
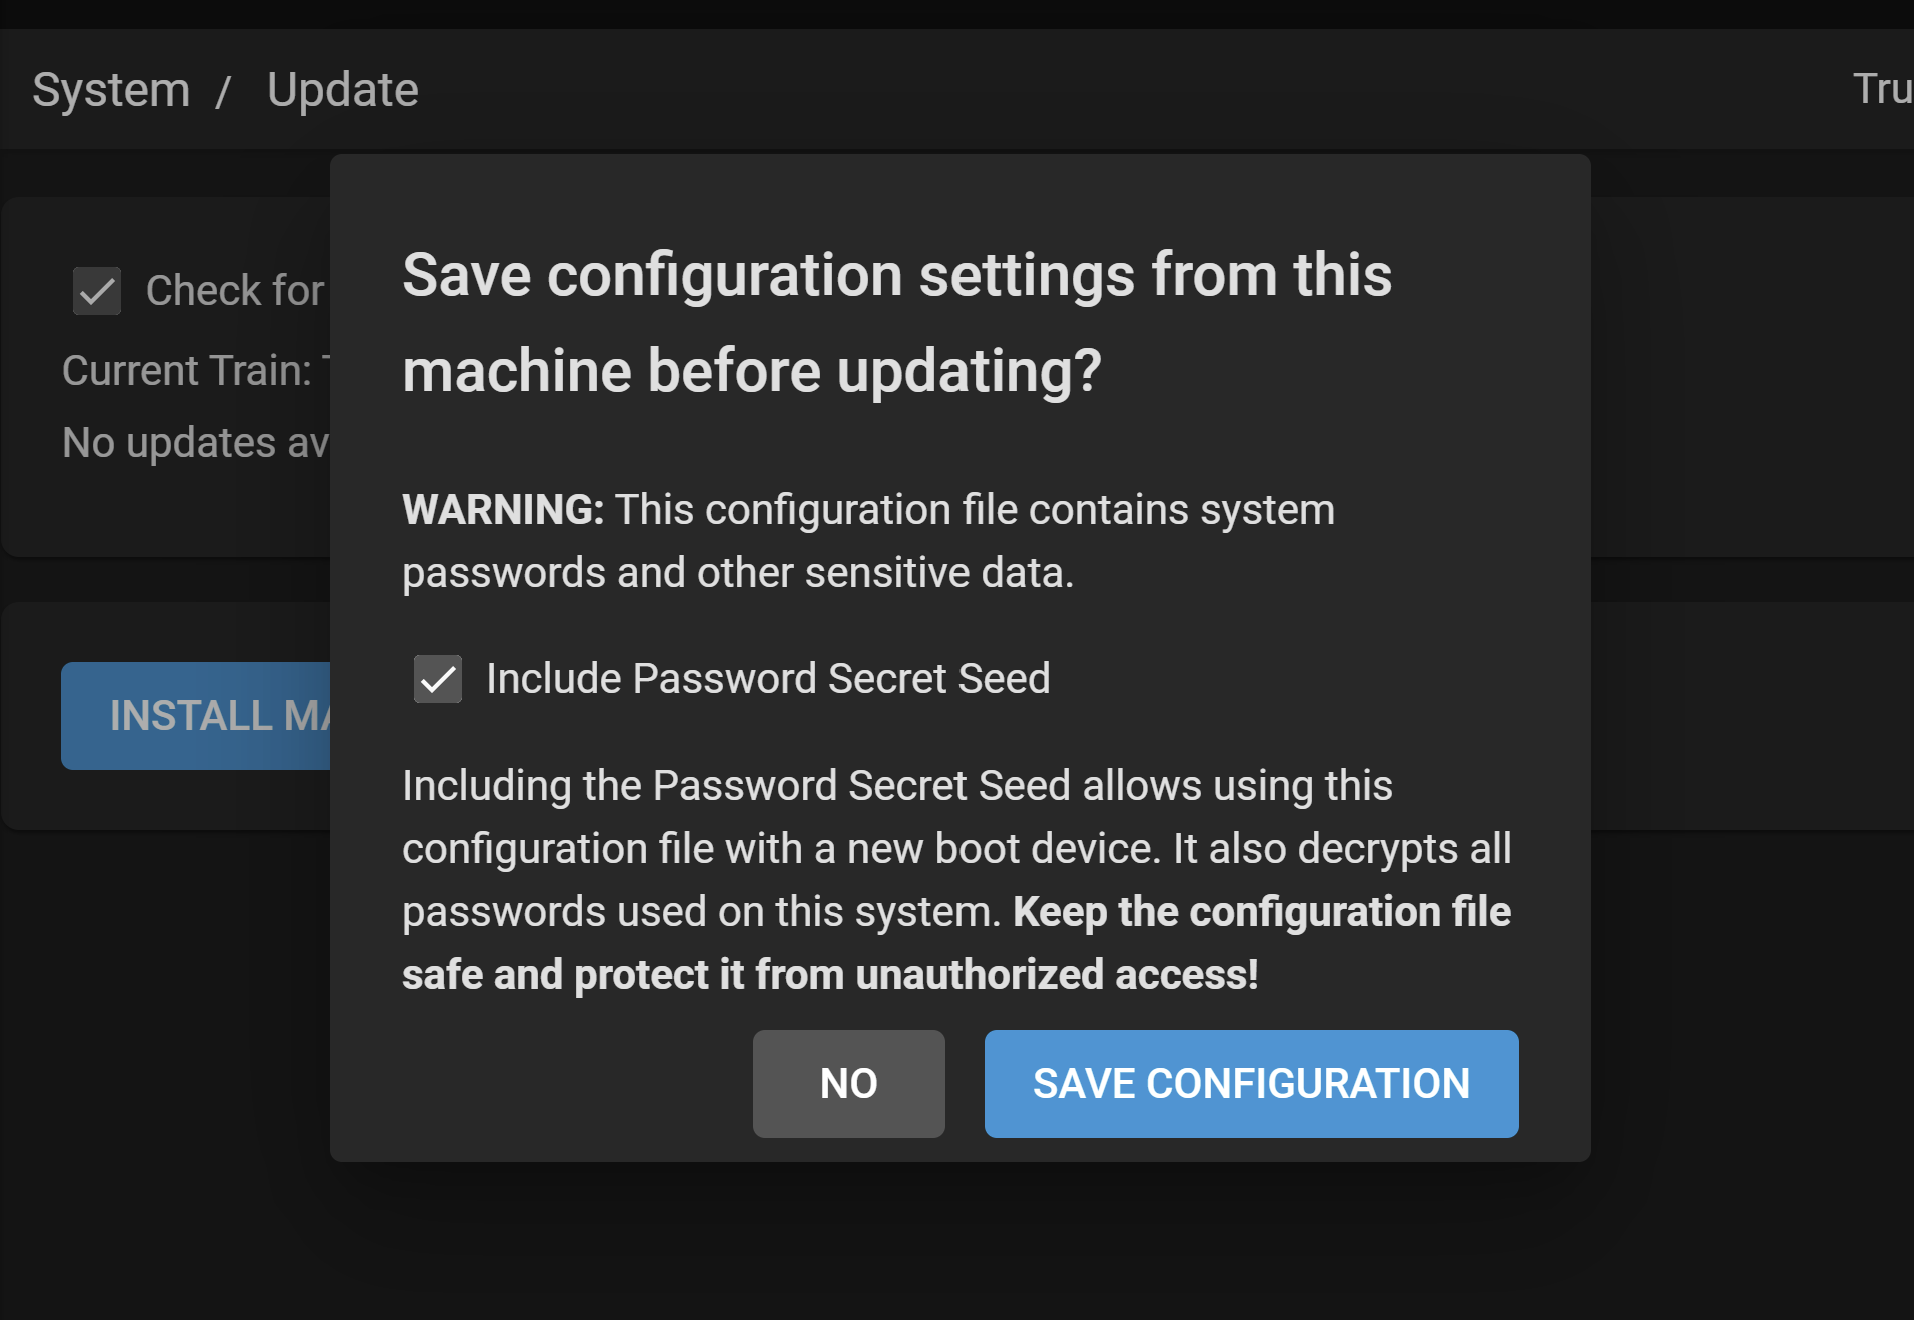
Configuration backup exported prior to migration to preserve recovery capability and encrypted dataset access.
These steps are critical. Without encryption keys or configuration backups, recovering datasets after migration may not be possible.
Official documentation: Migrating TrueNAS CORE to SCALE
Performing the Migration
TrueNAS provides two upgrade approaches:
- Bootable installer via USB
- In-place upgrade through the web interface
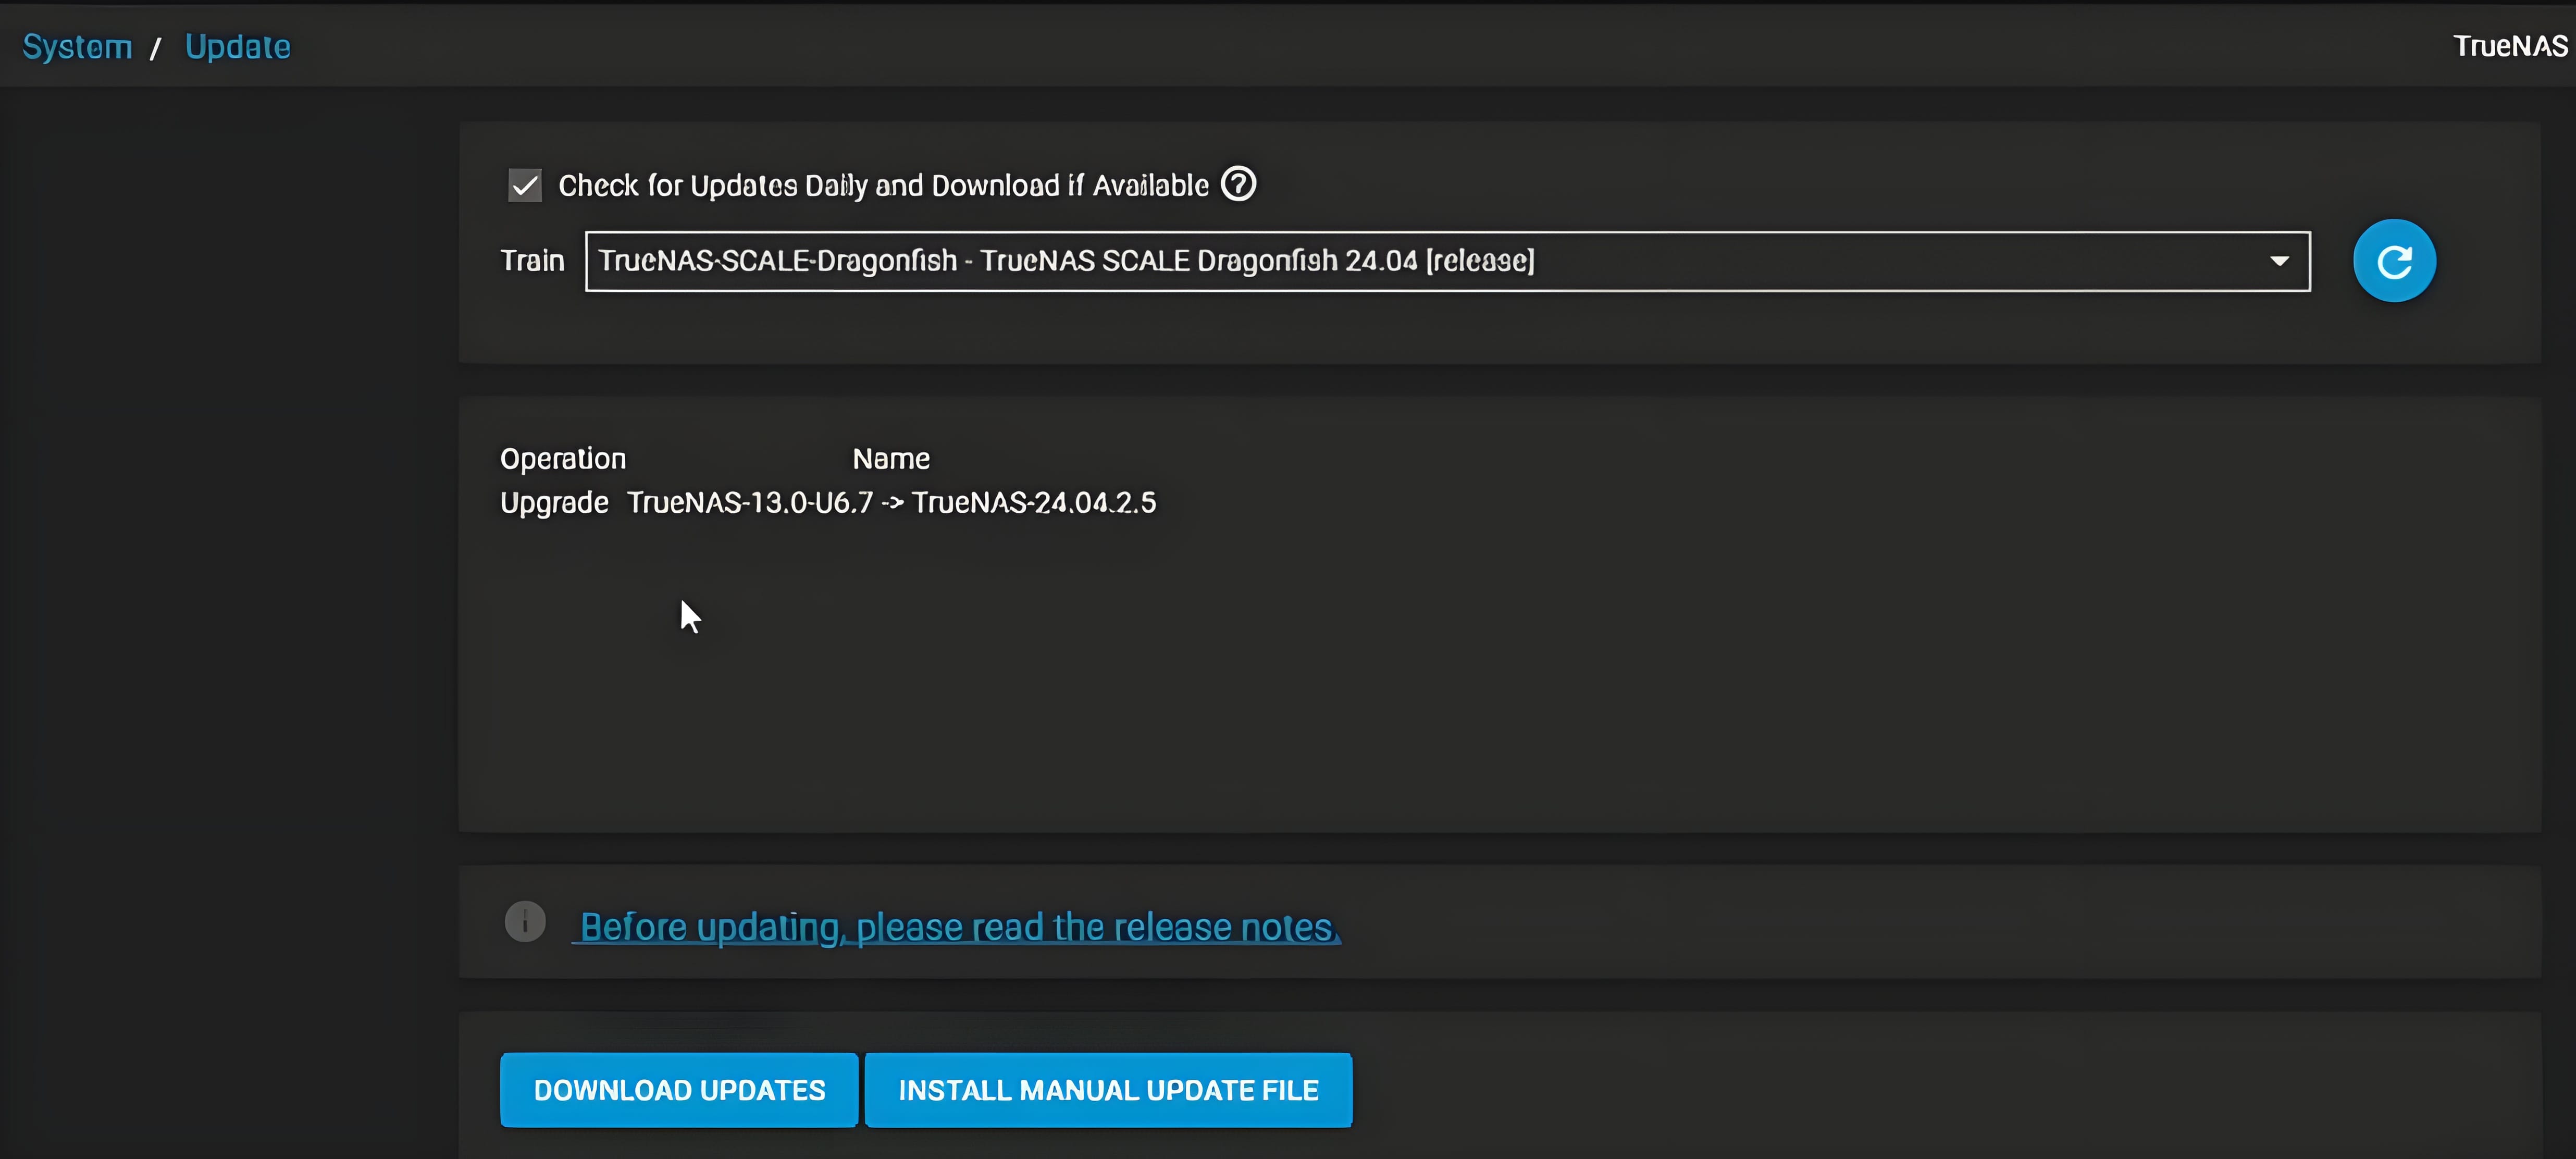
System upgrade interface showing migration from TrueNAS CORE to TrueNAS SCALE using the in-place upgrade workflow.
I selected the in-place GUI upgrade, which preserved system configuration and reduced manual reconfiguration effort.
The upgrade process:
- Navigate to
System → Update - Select TrueNAS SCALE from the update train
- Confirm migration warning (CORE rollback is not supported)
- Apply update and reboot
After reboot, the system returned to the TrueNAS console interface and displayed its assigned IP address. I then:
- Logged in through the web interface
- Verified storage pools remained intact
- Confirmed datasets and permissions persisted
- Validated SMB shares were still accessible
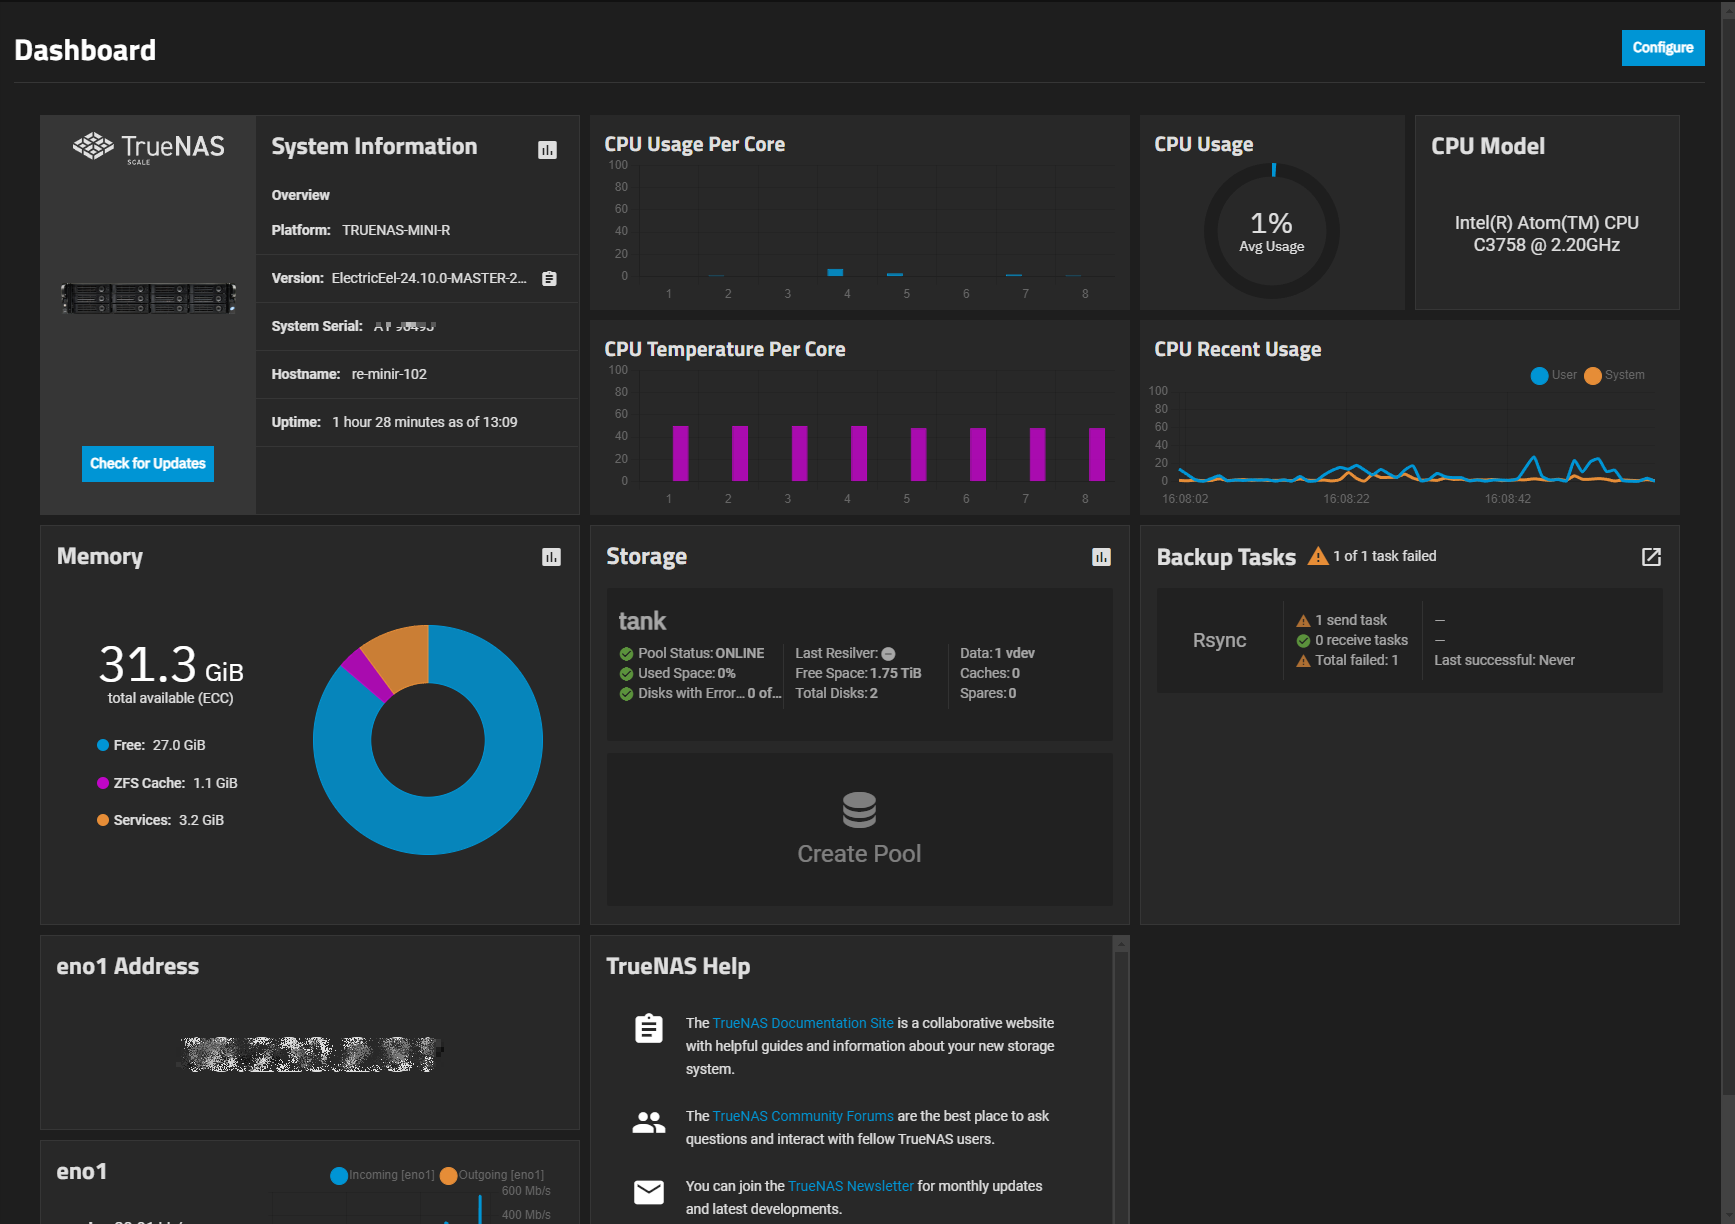
Representative TrueNAS SCALE dashboard interface after migration from CORE (TrueNAS Documentation Hub, 2026).
Because the NAS originally used DHCP addressing, the system IP occasionally changed. I later assigned a static DHCP reservation in my router to ensure consistent network access. Alternatively, TrueNAS also allows static network configuration directly from the console setup interface, which can be useful when router-level reservations are unavailable or during initial provisioning.
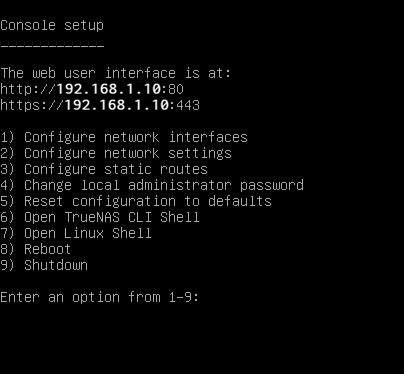
Example of TrueNAS console setup interface showing network configuration options available for assigning static IP addressing during initial system provisioning. (Using the Console Setup Menu, 2025)
Remote Access and Security Strategy
After completing the migration, I began planning secure remote access to the NAS. Rather than exposing services directly to the public internet through port forwarding, I implemented a Cloudflare Tunnel–based remote access architecture. This allowed secure external connectivity without revealing my home network’s public IP address. At the time of deployment, TrueNAS SCALE did not yet include a native cloudflared application, so I deployed the tunnel using Dockge and a Docker container. This section documents that original deployment approach for reference.
Dockge and Cloudflare Tunnel Deployment (Legacy Method)
Step 1 – Install Cloudflared Locally
Before deploying the connector container on TrueNAS SCALE, I installed the cloudflared CLI on a Windows workstation to authenticate with Cloudflare and generate the tunnel credentials used by the connector.
After installation, I verified the CLI was available in the system path using cloudflared --version before proceeding with authentication.
Step 2 – Authenticate with Cloudflare
Tunnel creation began from the TrueNAS shell:
cloudflared tunnel login
This command launched the Cloudflare authentication flow and generated a local certificate file:
~/.cloudflared/cert.pem
The certificate enabled local tunnel management.
Step 3 – Store Tunnel Credentials Persistently
Because containers are ephemeral by default, tunnel credentials were stored in a persistent dataset:
/mnt/tank/cloudflared/
Example structure:
config.yml
.cloudflared/cert.pem
This ensured credentials remained available after container restarts.
Step 4 – Create the Named Tunnel
Next, I created a named tunnel:
cloudflared tunnel create
This generated a tunnel UUID and credentials file:
~/.cloudflared/
The credentials file was copied into the persistent dataset directory.
Step 5 – Configure Tunnel Routing Rules
Hostnames shown below are generalized for security purposes. demo.example.com represents the NAS management interface, and app.example.com represents the Nextcloud service exposed through the tunnel.
A configuration file defined how Cloudflare routed external requests to internal services:
Example:
tunnel: 12345678-abcd-1234-abcd-123456789abc
credentials-file: /cloudflared/12345678-abcd-1234-abcd-123456789abc.json
ingress:
- hostname: demo.example.com
service: http://192.168.x.x:80
- hostname: app.example.com
service: http://192.168.x.x:11000
- service: http_status:404
Ingress rules mapped public hostnames to internal services hosted on the NAS.
Step 6 – Mount Configuration into Dockge
To allow the container access to tunnel credentials, the dataset directory was mounted into the container:
/mnt/tank/cloudflared
This provided access to:
- config.yml
- tunnel credentials JSON
- cert.pem
Step 7 – Deploy the Tunnel Container
Inside Dockge, I created a stack using the Cloudflare tunnel image and mounted the dataset as a persistent volume.
After defining ingress routing rules and storing tunnel credentials in a persistent dataset, the cloudflared connector was deployed as a container using Dockge.
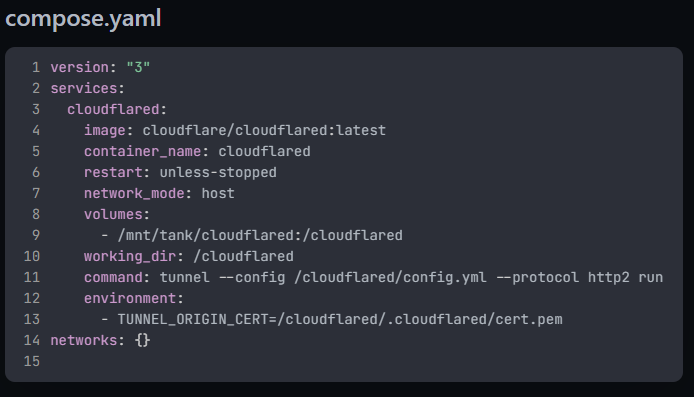
Docker Compose configuration used to deploy the cloudflared connector via Dockge with persistent dataset mounting and host networking enabled.
The connector container was deployed using host networking to simplify service reachability between the tunnel endpoint and internal NAS services.
The container executed:
cloudflared tunnel --config /cloudflared/config.yml --protocol http2 run
Host networking was used to simplify connectivity between the connector and NAS services.
At the time of deployment, explicitly selecting HTTP/2 transport improved tunnel stability compared to the default QUIC transport.
Step 8 – Route DNS Through the Tunnel
Public DNS hostnames were associated with the tunnel:
cloudflared tunnel route dns (tunnel-name) demo.example.com
cloudflared tunnel route dns (tunnel-name) app.example.com
This directed inbound traffic through Cloudflare’s edge network before reaching internal services.
The Cloudflare dashboard also includes a DNS configuration interface where public hostnames can be associated with the tunnel, allowing external requests to be routed to internal NAS services without exposing inbound firewall ports.
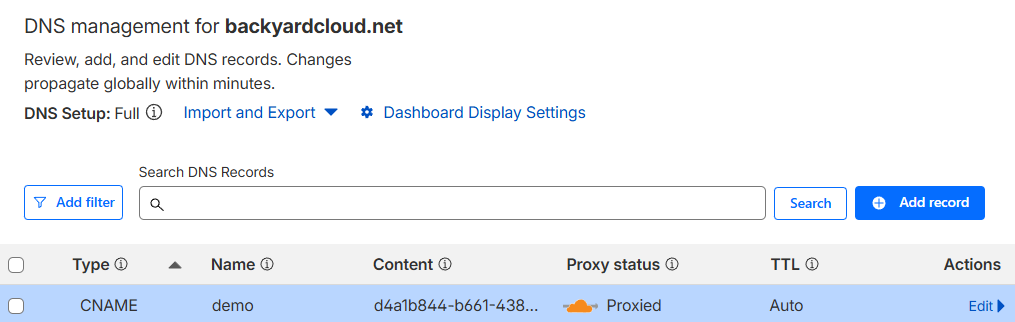
Cloudflare DNS CNAME record associated with a tunnel endpoint, enabling secure routing of external requests to internal NAS services through the Cloudflare edge network.
Step 9 – Validate Connectivity
Before testing externally, I confirmed services were reachable locally:
http://(IP):(PORT)
Once verified internally, I tested access through the public hostname and confirmed successful routing via Cloudflare Tunnel.
Container logs in Dockge confirmed the connector established outbound connections correctly.
Additionally, the Cloudflare dashboard provides a tunnel status interface that displays connector health and confirms whether the tunnel is actively maintaining an outbound connection to the edge network.
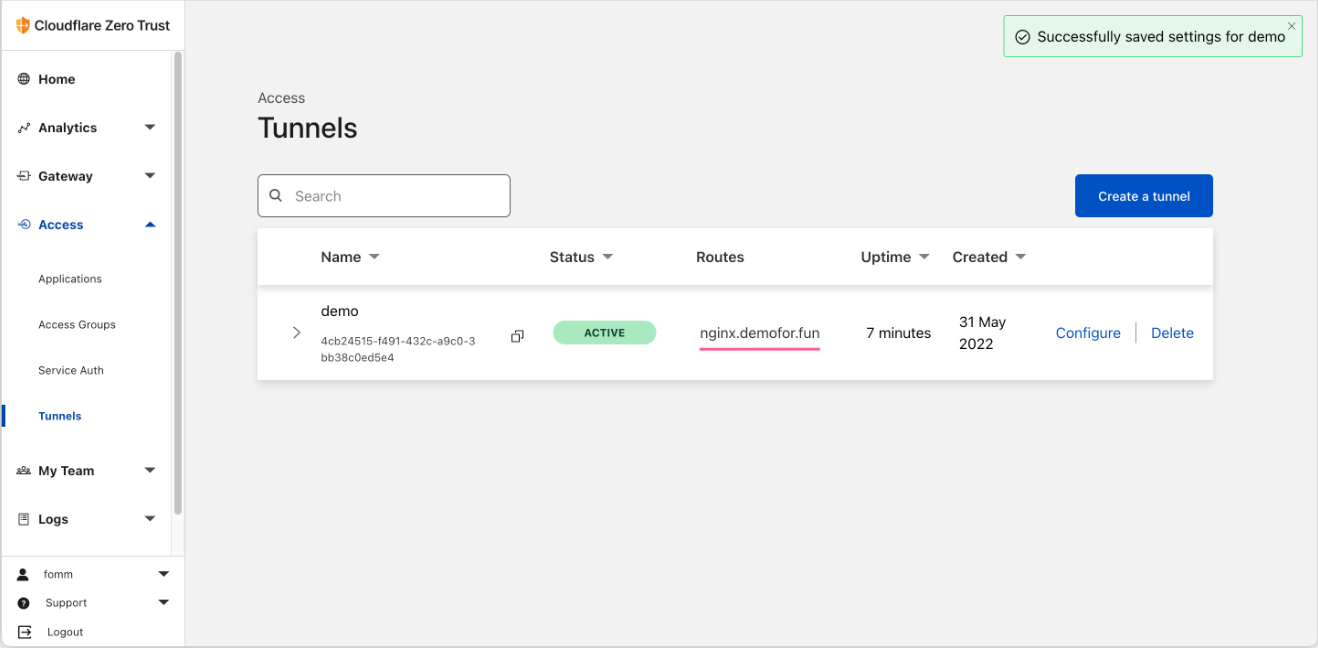
Representative Cloudflare Tunnel status view confirming connector activity (Red Tomato’s Blog, 2025).
At this stage, internal NAS services were reachable through Cloudflare Tunnel using DNS-mapped hostnames and a containerized connector, eliminating the need for port forwarding while preserving encrypted outbound-only connectivity.
Key Takeaways
Migrating from TrueNAS CORE to SCALE modernized the NAS platform by enabling containerized applications, expanded service support, and long-term compatibility with newer deployment tools. This phase also introduced secure remote connectivity using Cloudflare Tunnel, allowing internal services to be accessed externally without exposing the home network through traditional port forwarding. These changes established the foundation for later improvements such as reverse proxy routing and identity-aware access controls implemented in subsequent stages of the project.
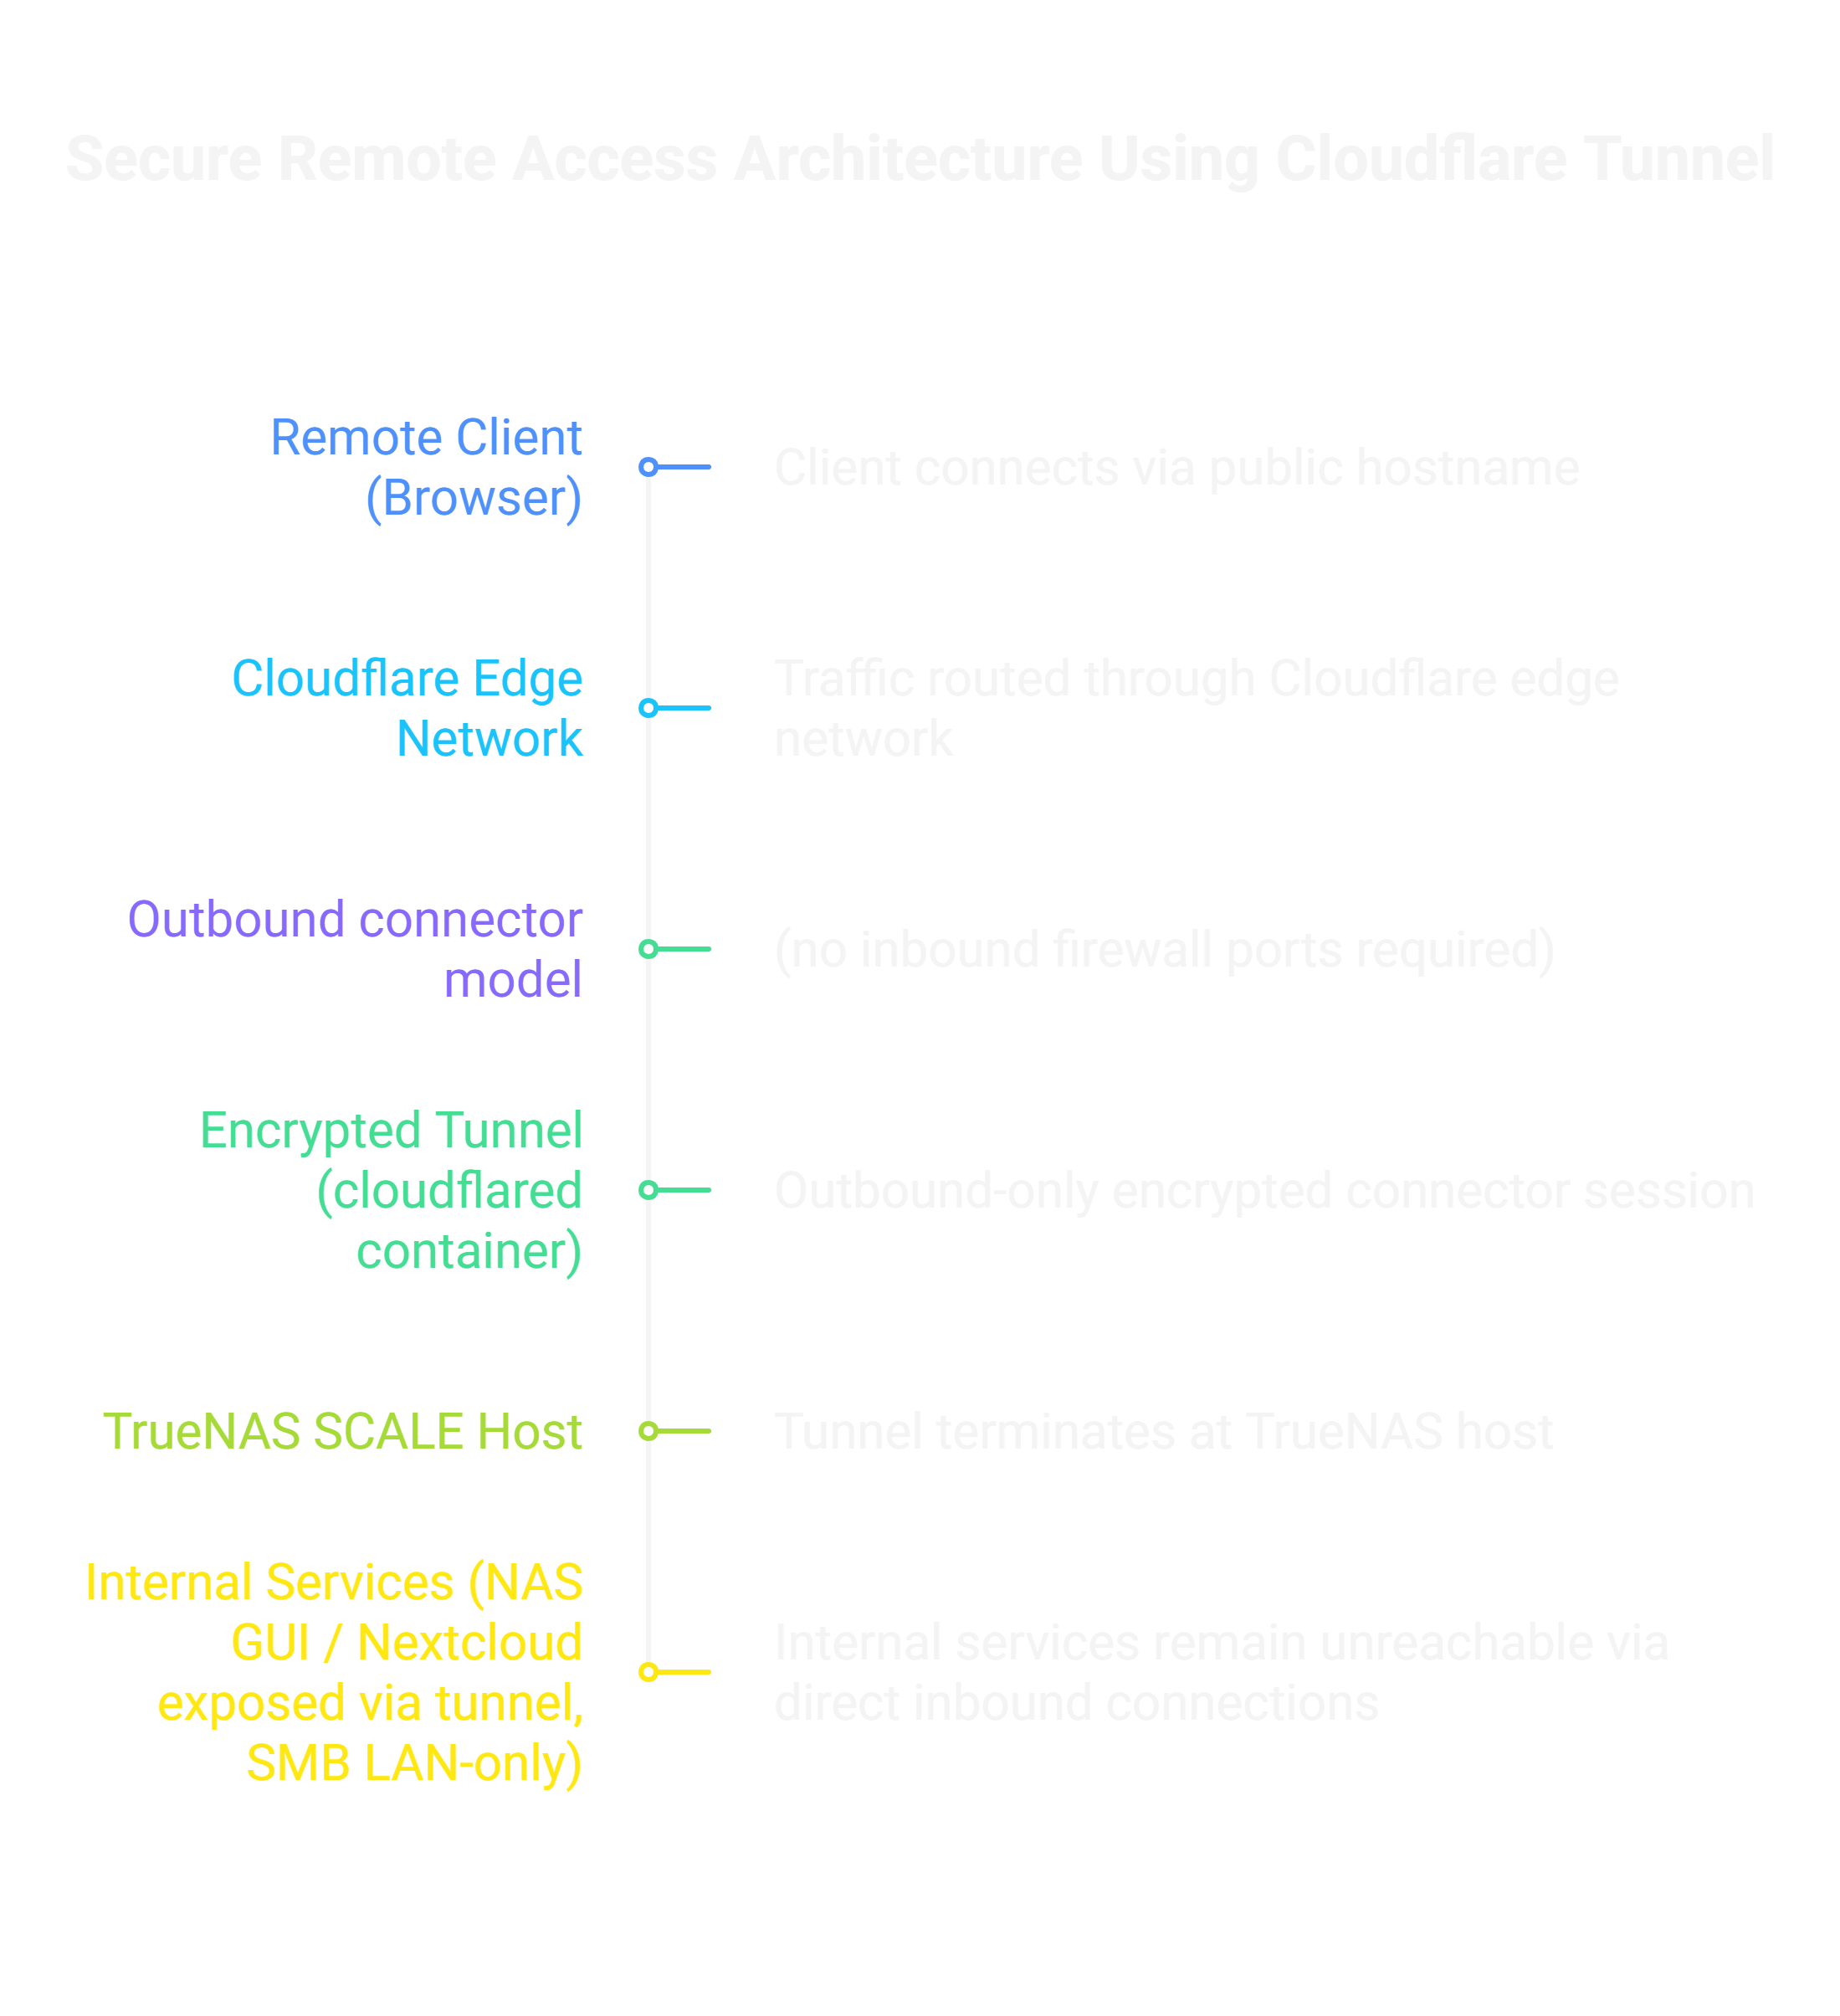
Architecture showing outbound-only Cloudflare Tunnel connectivity enabling secure remote access without exposing internal NAS services directly to the public internet.